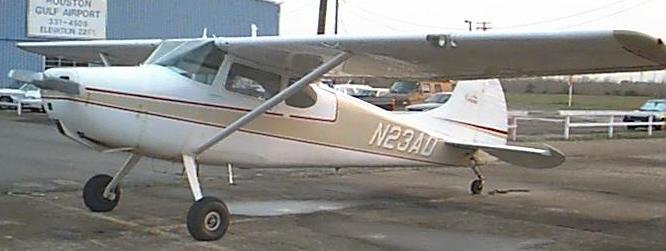
The Cessna 170 at the tiedown spot. This would be my introduction to the fine art of tailwheel aircraft. Made in 1951, this model was built with a different design philosophy to newer aircraft.
| A TALE OF TAILDRAGGING - CESSNA 170A |
|---|
| -- Checking Out -- |
|---|
At the time of writing, I had accumulated about 200 hours. However, I still had not flown a tailwheel aircraft. A great opportunity presented itself in our club recently - a well-kept 1956 Cessna 170A. During January, I decided I had procrastinated enough ... it was time to get checked out in the 170.
First Flight. 30th January 1999.
I began my checkout with one of the co-owners of the aircraft, Don Cooper, who is also a CFI. I thought it would be a good idea to get checked out with the owner since he would probably be the most cautious in letting me loose in the aircraft! We began with a discussion of tailwheel aircraft. The biggest difference with a nosewheel aircraft is that the C of G lies behind the main wheels. In a nosewheel aircraft, if you land slightly askew, it will tend to try to straighten out, since on the ground, a nosewheel aircraft wants to keep going forwards. However, due to the C of G position, a tailwheel aircraft would rather travel backwards on the ground! This is not what the pilot desires, and if the pilot doesn't keep ahead of things, can suffer a groundloop (where the tail suddenly swings around) which usually results in beaten up wingtips if it happens at any speed, and severe damage to the pilot's ego and wallet.
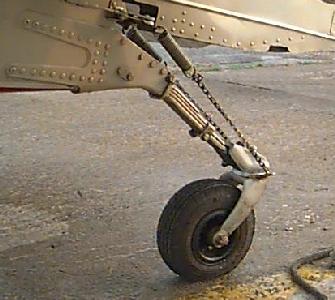
Detail of the tailwheel. In this photo, it has castered like the wheel on a shopping cart. |
The first order of the day after this was the preflight, which
is pretty much the standard Cessna preflight, except that you must remember
to move the cover off the fuel vent! Things I noticed on the preflight especially
were the simple hinged flaps (which go down to 50 degrees - newer Cessna
singles tend to have Fowler flaps), the complete absence of any wing dihedral,
and the 6-cylinder O-300 Continental engine (which produces 145 bhp). This
gives a nice meaty sound when running! It is also necessary to preflight the tailwheel which includes checking that the control cables are present and correct, and that the tailwheel is properly attached. The springs and chains in the picture are linked to the pedals and give some limited steerability to the wheel. |
Once taxiing, Don asked me whether I knew about "windage". This
is something that all Cessna pilots (should) know regardless of where their
wheel is located (with a minor difference in nosewheel aircraft). The basic
rule whilst taxiing is to position the flight controls to either dive away
from the wind, or climb into the wind depending on where the wind is coming
from. For example, if the wind is a quartering tailwind from the left side,
you would push the yoke forward and turn it to the right. (Another way of
thinking of it is that you always turn the yoke as if you wanted to fly in
the same direction as the wind). With a nosewheel high-wing Cessna the only
difference is that you generally don't climb into the wind - you just leave
the elevator neutral if taxiing upwind. It is especially important to remember
to "fly" tailwheel aircraft on the ground!
The real difference I noticed on the ground was how much further
you had to plan your turns. I have often tried tailwheel aircraft on MS Flight
Simulator. I thought they were inaccurately modelled since they were so difficult
to steer! However, the real thing really is that difficult to steer
compared to a nosewheel aircraft. The secret is in the judicious use of
differential braking. A quick shot of power with the rudder fully deflected
in the direction you want to go can help too (it gives some airflow over
the tailsurfaces). It is also a very good idea to taxi slowly so that it
does not get away from you!
| Run-up is conventional. Once we had done the pre-takeoff checks, we lined up and got ready to go. There was quite a bit of crosswind, so this would turn out to be quite an exciting takeoff! In a nosewheel aircraft, you have quite a bit of positive steering from the nosewheel on the ground until you rotate. However, with a tailwheel, the tailwheel soon comes off the ground on the takeoff roll, meaning you must maintain directional control with the rudder only, and it requires fairly quick and accurate corrections if the crosswind is a bit gusty (which it was). I swerved on that takeoff a little bit! However, we soon broke ground. The big rudder is very necessary on a tailwheel aircraft as I found out - it's your directional control on the ground too. |
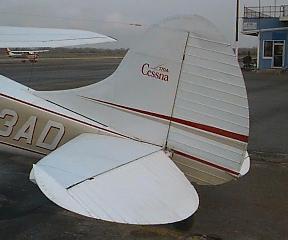
The tailplane of the 170 - it's a work of art. The vertical stabilizer curves elegantly. Notice the size of the rudder. It still i has authority at surprisingly low speeds! |
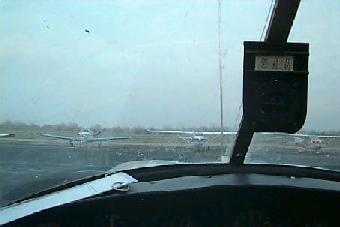
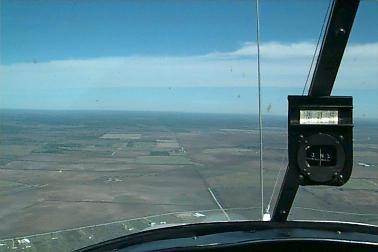 The view out the front. Notice how the nose slopes away and does not obstruct the pilot's view.
|
The thing about the C170 is that in a takeoff attitude, the view over the nose is quite similar to many other aircraft in level flight, so I had a tendency to pull back a little far. I noticed the airspeed bleeding off a little, so I lowered the nose. We climbed to about 1500 feet, and then levelled out. The view over the nose is very very...very...really...excellent in the 170! It's similar to a Cessna 172 when it's on short final with all the flaps out. You can see a lot out the front! This is because the panel on older aircraft tends to be quite low (and also the seat is quite high). It took a little getting used to being able to see so well out of the front of the aircraft. |
|
Takeoffs and Landings. 2nd Feburary, 1999
The day's mission was to practise takeoffs and landings. In
total, I did six stop-and-goes (we don't do touch and goes in the 170 since
this can distract you easily from the all-important task of directional control
whilst doing things like reconfiguring for takeoff.) We also went out of
the pattern to check on a Piper Cub on floats which was on a nearby lake. |
|
One thing that I noticed was when the tail touched down, the
yoke had a tendency to jerk forward a little. This is because of the momentum
of the elevators. They have not much in the way of balance weights, so when
the tail touches down, the elevator wants to keep moving in a downward direction.
It surprised me a bit at first, but now I'm prepared for it. We also did
a forward slip to landing. This aircraft slips very well, and we could get
a good descent rate by slipping hard. The other thing that struck me was
the amount of aileron authority we had immediately after touchdown. There
was a crosswind component to the wind, and it really didn't take a lot of
aileron to hold the downwind wing down after touchdown. Once again, I had
a bit of a tendancy to overcorrect. I just need to get more practise and
more used to the feel of the controls during the rollout.
Don expressed good feelings about my progress so far. I think
it helps that my primary instructor, Lee Simmons, had always taught me to
"fly it till you tie it" and emphasised proper control inputs during takeoff
and rollout (especially in a crosswind) and to have the control wheel all
the way back on touchdown.
Wheelies! 7th Feb, 13th Feb 1999
A new challenge awaited on an overcast Sunday morning.
The weather was MVFR but since we were in the pattern, it wasn't really a
problem. Visibility was reasonable, but the ceilings were not high. This
time I would be flying with Earl Phillips, the co-owner of the C170, and
also a CFI.
Wheel landings. The art of landing on just the mains without
bouncing all over the place or striking the prop! The basic essence is that
you come in and fly the plane on. When the mains touch down, you give it
a little forward stick to reduce the AoA to stick the plane on the ground,
then gradually put more forward stick in until you can't hold the tail off
any longer. Sounds easy?
The first attempt ended up in a go-around! I experienced first
hand the "taildragger bounce". I mis-timed it slightly and landed hard. The
momentum of the tail means the tail goes down, increasing the angle of
attack...making the plane fly again! Of course, it doesn't fly for very long
because you rapidly start running out of airspeed, so you come down again.
Harder. This means the tail goes down faster...increasing the AoA by even
more this time, so you bounce higher, getting slower! This is...exciting.
On the second bounce I decided that 10 feet in the air with the stall horn
going off was not a good place to be so I shoved the throttle in and went
around.
My second wheel landing was a beautiful greaser. Absolutely
perfect. However, I then had a major case of head-swelling, and proceeded
to get cocky and my next two landings were...well, good bounce recoveries!
Aviation is one of those things where you can look like Sky King one minute,
and a prize chump the next. However, Earl was pleased with my progress so
far.
On the 13th Feburary, I flew with Earl again since Don
was unavailable and I just had to fly and get the hang of wheel landings.
The first one was so-so (well, a good bounce recovery!), the second two resulted
in go-arounds and a close encounter with the runway lights (at least SPX
is 60 feet wide which helps things out!), but the next five were really quite
good. Somehow it all clicked and I could make consistent landings. I think
on my first three I was getting too worried about my touch down point; on
my last landings I decided that landing 1500 feet down SPX's 5,000 foot runway
should really be ignored for now - and I concentrated solely on getting the
hang of the actual wheel landing. This worked well. Now I can start thinking
about the touchdown point since I've got the actual mechanics fixed in my
head! Well, we'll see in the next session anyway...
I also did a forward slip to lose altitude too. You can really
control your descent rate with slips in this aircraft - a gentle slip is
surprisingly effective too. I think next time we have a spot landing competition
I'll fly the 170!
23rd February was the day I got my tailwheel signoff! All I needed was some crosswind practise. The plane was a little different too - some squawks had been worked off - it turned out that the tailwheel wasn't steering properly, and last week the elevator had started to bind, so both of these had been fixed. The new tailwheel certainly made the plane easier to steer on the ground (but of course it was still a world apart from a nosewheel aircraft!) I was flying with Don, and we started off with a three-point landing, then a wheel landing. Both went well. I was a little worried that I might have lost the nice touch I acquired last week with the wheel landings! We then went to LaPorte, where there was more of a crosswind. The wind was blowing about 10 knots. However, everything clicked into place, and I did a nice three point landing (or rather two point - tailwheel and the upwind main) and then followed up with a wheel landing. I didn't swerve too much either! We then returned to Houston Gulf, where I executed a sweeeet wheel landing. (I could already feel my big head coming along ;-)). Don said he thought I was doing well and should just go and get a little practise in alone! My logbook is now signed off with a tailwheel endorsement. Tomorrow I'm going to practise it alone!
| -- Nosewheel Converts -- |
|---|
So, what would I recommend to nosewheel pilots?
Go and get your tailwheel endorsement! It is a lot of fun
and a good skill to learn. It'll improve your nosedragger landings too.
Here are some points I learned whilst getting converted to the Order
of the Tailwheel:
Fly it till you tie it!